Firstly, I would assume that you already have an image that you’d like to use an icon.
Android apps need to have multiple icons for:
- MDPI
- HDPI
- XHDPI
- XXHDPI
- XXXHDPI
Don’t worry. We are not gonna manually create all those. If you already have one good/crisp image to use an icon, that is good enough.
Are you ready? Here we go!
Step 1: Generate multiple icons.
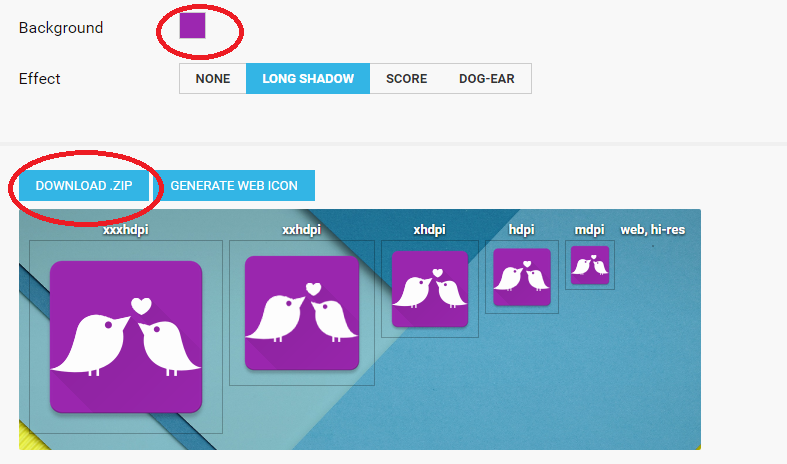
Use a Launcher Icon Generator provided from Android Asset Studio.
Import your image.
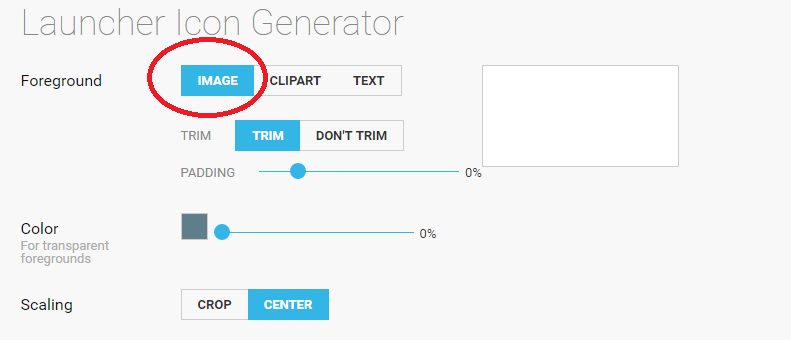
Specify the background & the icon shape according to your preference. Then, download the zip file.
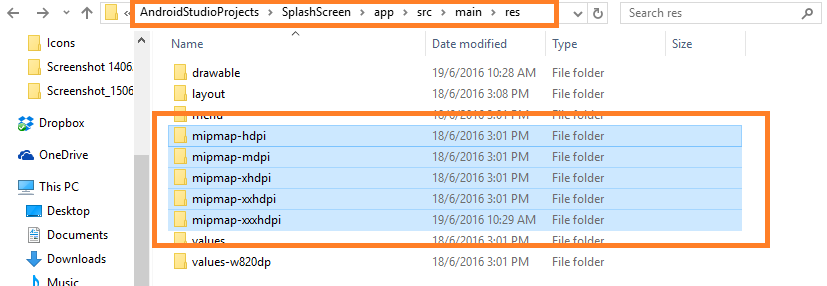
Step 2: Extract the zipped file.
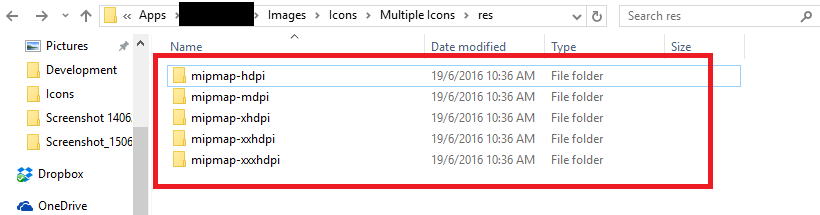
Step 3: Place the extracted folders under your /res folder.
Wait wait wait! How do you know that it has to be placed under the /res folder?
Look at your AndroidManifest.xml manifest file bro!
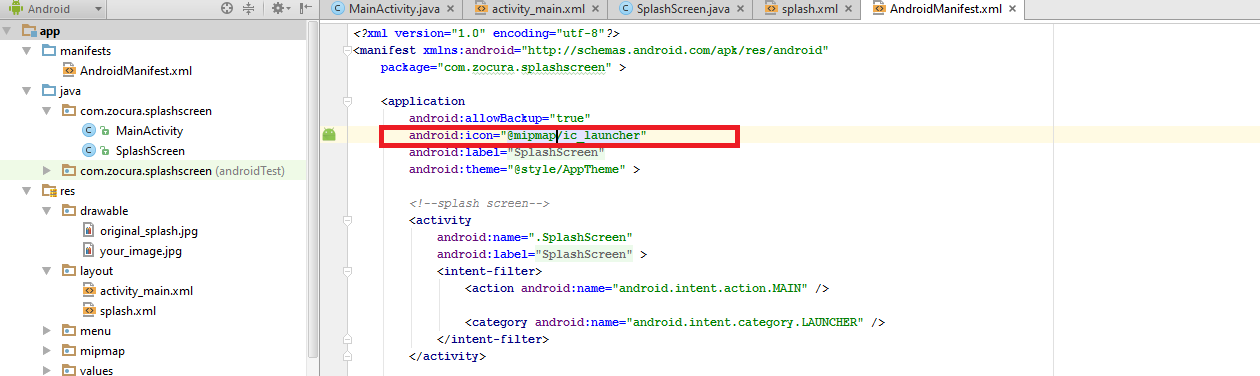
mipmap folder is located under the /res folder. So, all you need to do is to place the extracted folders under the /res folder.
Step 4: Verify!
Re-build your android project, and run it on your phone. You should be able to see your app icon by now! 

That’s it! I hope you enjoyed reading this!